
Cross-Repo CI Automation
This is the officially recommended automated deployment architecture.
Whenever changes are pushed to your content repository, it sends a repository dispatch notification to the theme code repository. GitHub Actions in the theme repo automatically validates configs, slices Chinese fonts, builds static pages, and deploys to production.
Core Configuration Steps
Generate GitHub Personal Access Token (PAT)
To allow the private content repository to trigger builds in the theme repository, create a token with repository dispatch permissions:
- Go to GitHub -> Top-right Avatar -> Settings -> Developer Settings;
- Select Personal access tokens -> Fine-grained tokens;
- Click Generate new token;
- Repository access: Select Only select repositories, and check your Theme Code Repository;
- Permissions: Under Repository permissions, find Contents, and set to Read and write;
- Click Generate token and copy it immediately.
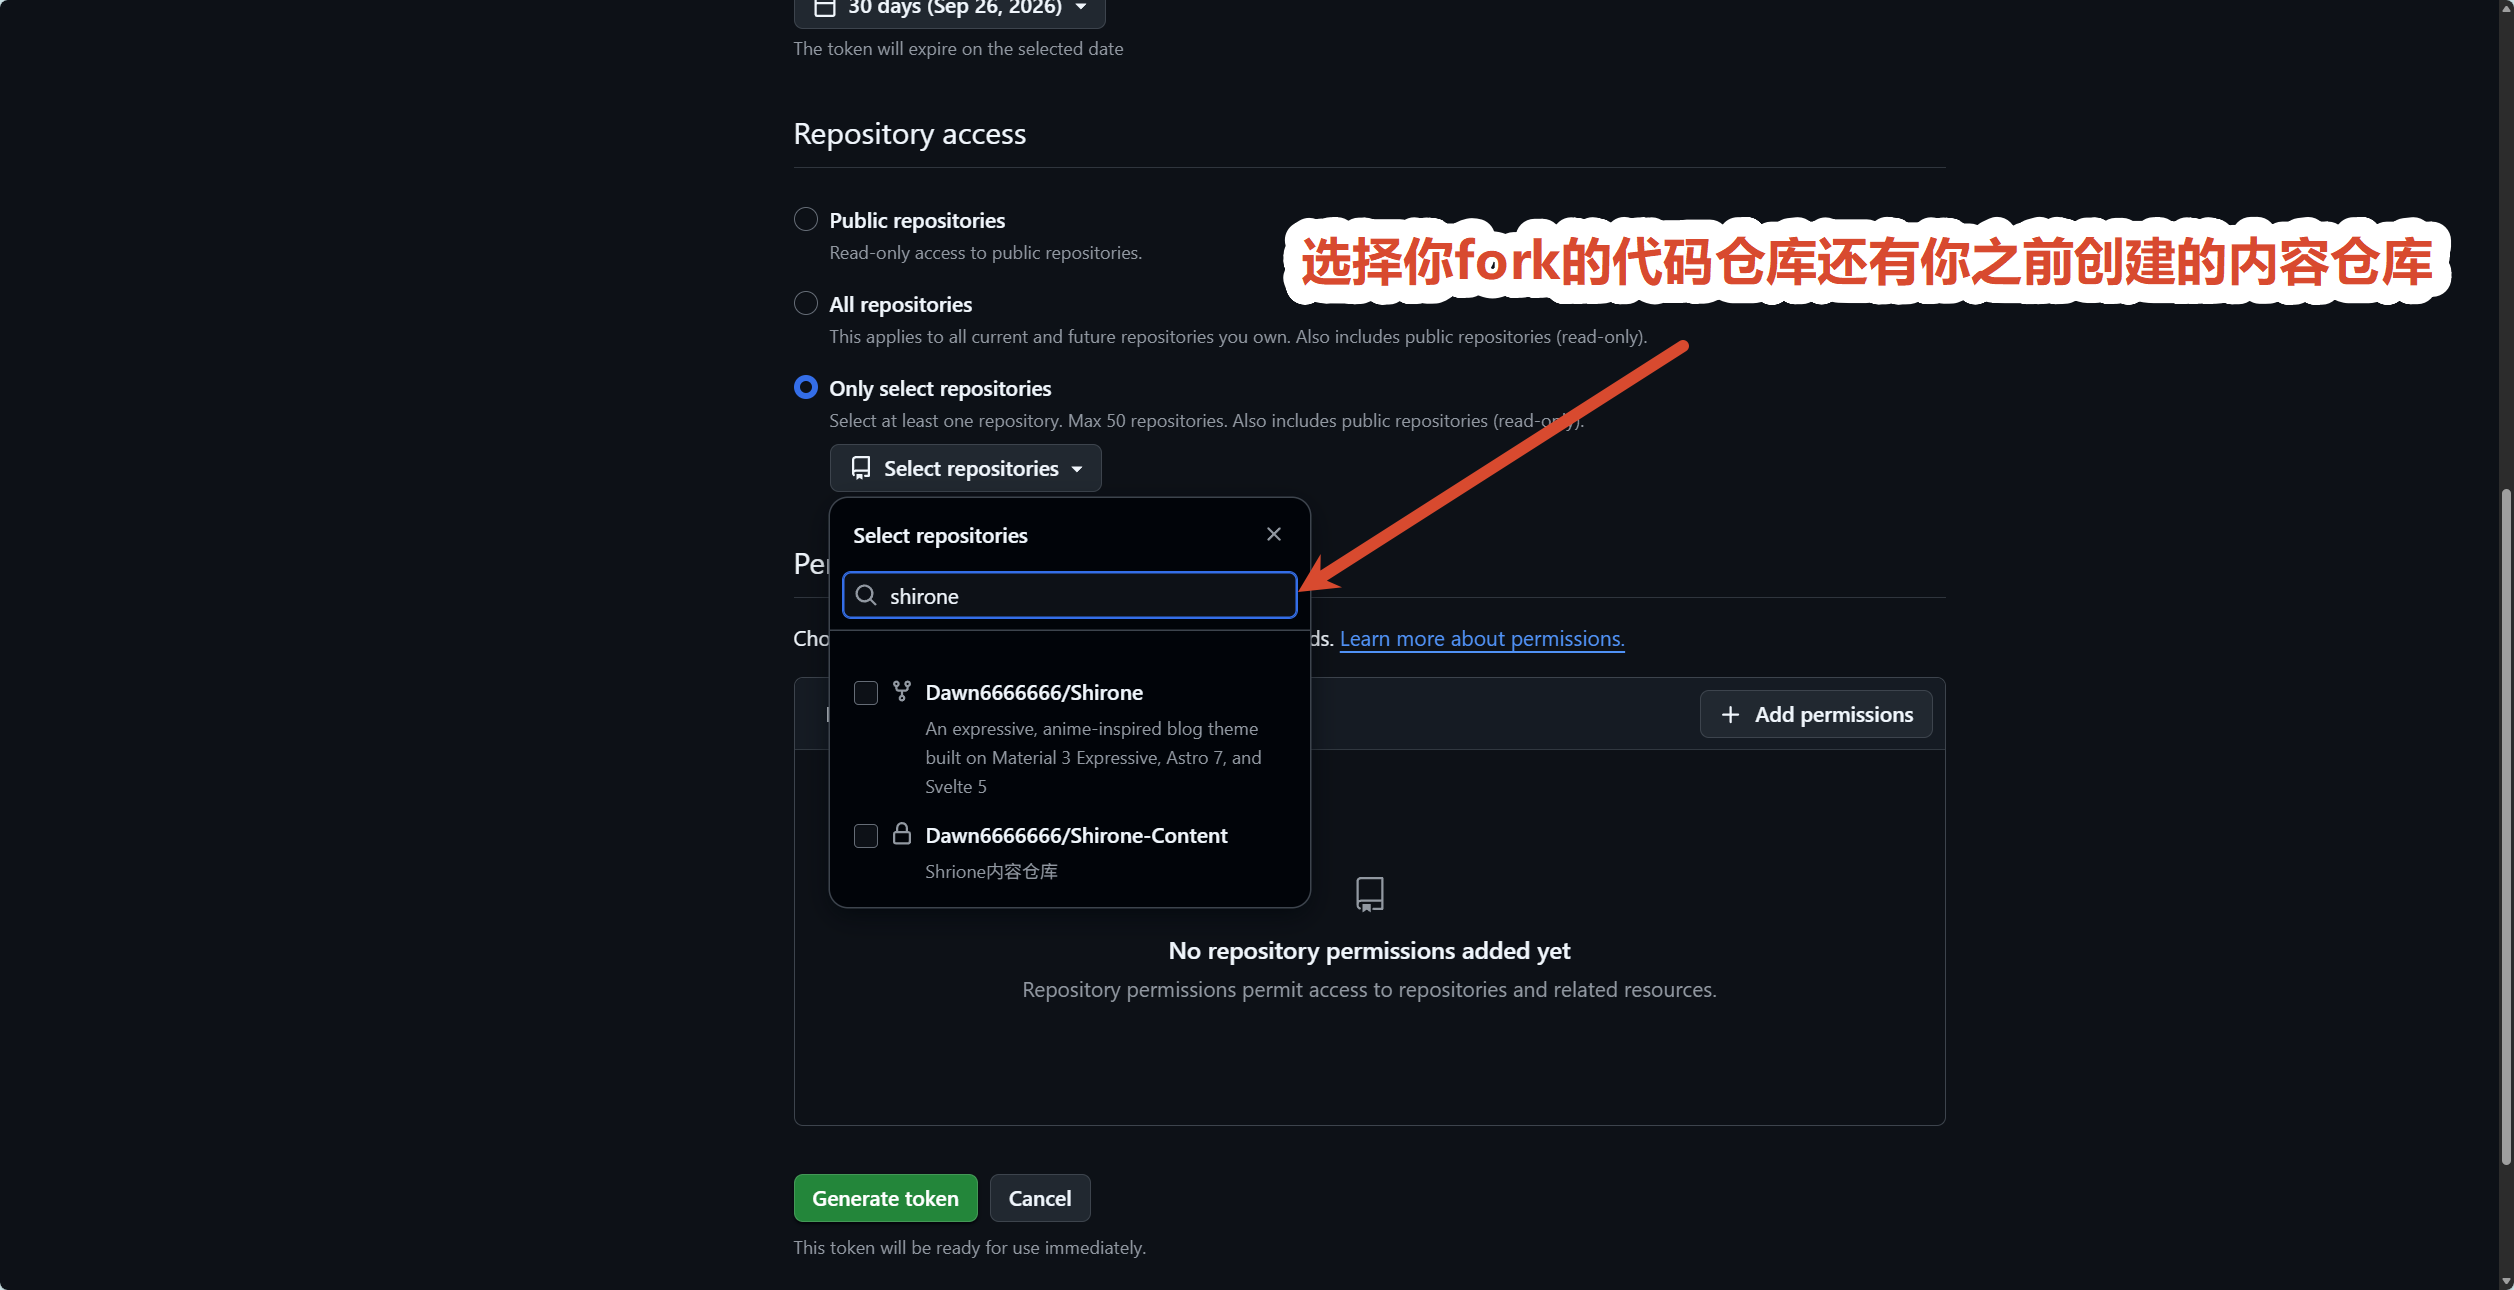
Keep Personal Access Token Secure
Tokens are shown only once. Never commit raw tokens to code files; always store them in GitHub Encrypted Secrets.
Configure Secret in Private Content Repository
- Navigate to your Private Content Repository;
- Click Settings -> Secrets and variables -> Actions;
- Click New repository secret;
- Name: DISPATCH_TOKEN (exact case match);
- Secret: Paste the Personal Access Token;
- Click Add secret.
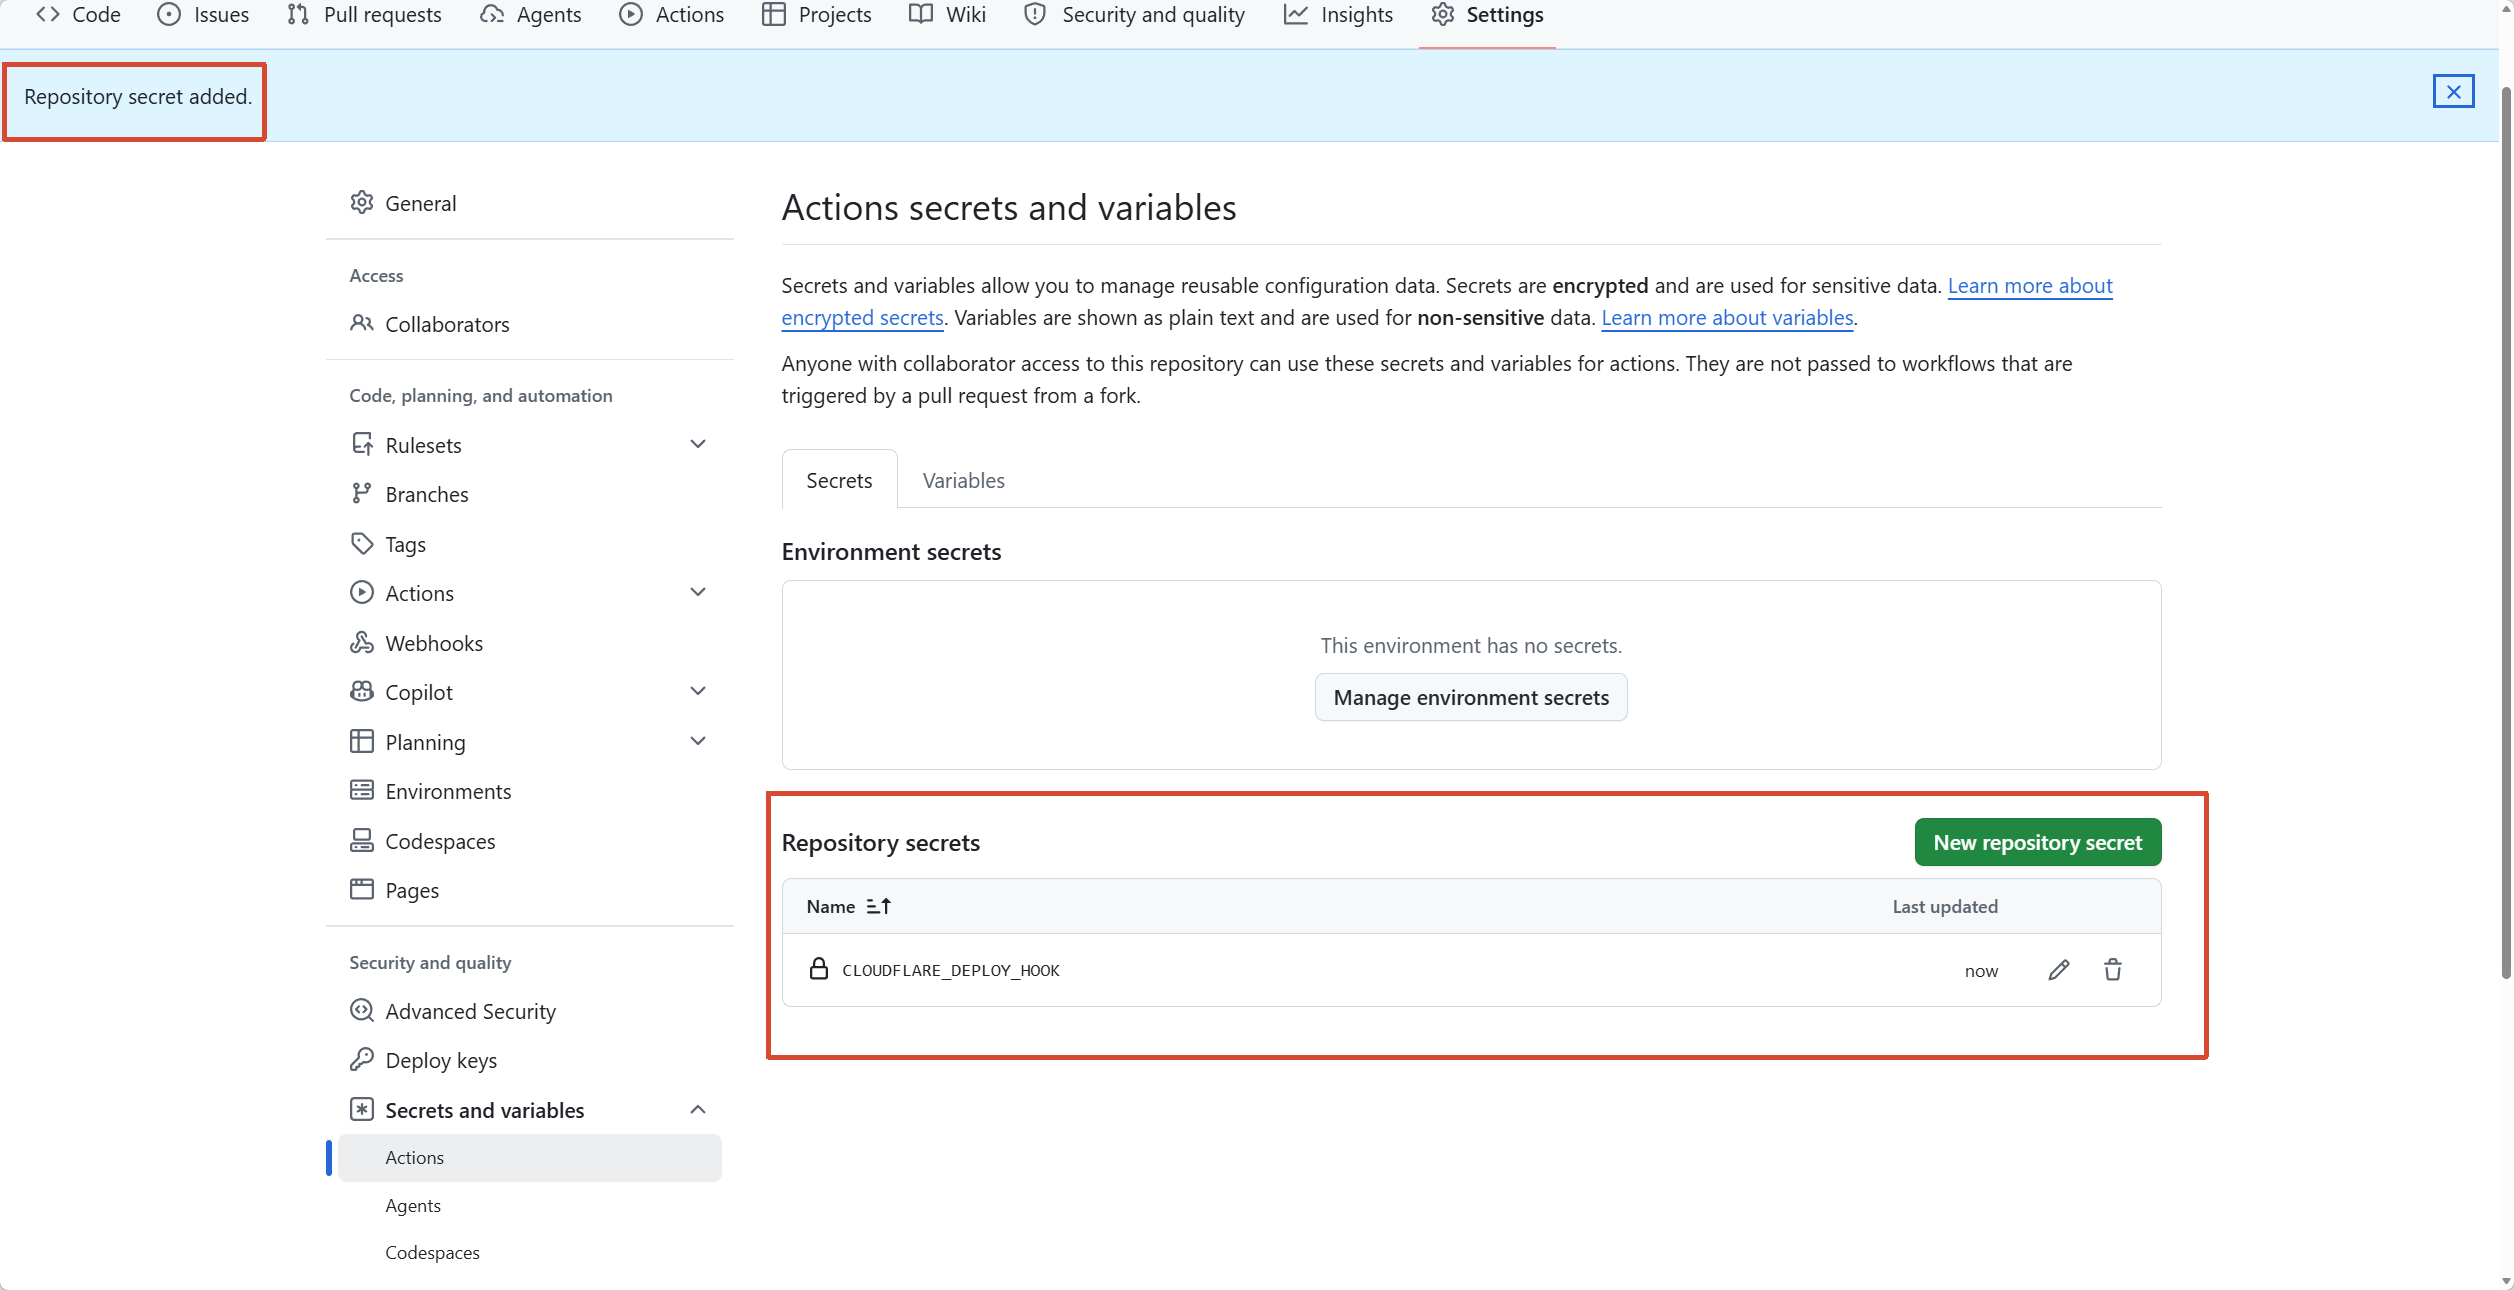
Add Trigger Workflow in Content Repository
Create
.github/workflows/trigger-build.ymlin your content repository:name: Trigger Theme Build on: push: branches: [main] workflow_dispatch: jobs: dispatch: runs-on: ubuntu-latest steps: - name: Dispatch build event to theme repository env: DISPATCH_TOKEN: ${{ secrets.DISPATCH_TOKEN }} if: ${{ env.DISPATCH_TOKEN != '' }} uses: peter-evans/repository-dispatch@v4 with: token: ${{ env.DISPATCH_TOKEN }} repository: YOUR_GITHUB_USERNAME/YOUR_THEME_REPO_NAME event-type: content-updated client-payload: >- {"sha": "${{ github.sha }}", "ref": "${{ github.ref }}", "repo": "${{ github.repository }}"}Configure Dispatch Receiver in Theme Repository
Create or update
.github/workflows/deploy.ymlin the theme repository:name: Deploy Shirone Blog on: push: branches: [main] repository_dispatch: types: [content-updated] workflow_dispatch: jobs: build-and-deploy: runs-on: ubuntu-latest steps: - name: Checkout Theme Repo uses: actions/checkout@v4 - name: Setup Node.js & pnpm uses: pnpm/action-setup@v3 with: version: 9 - name: Setup Node uses: actions/setup-node@v4 with: node-version: 20 cache: "pnpm" - name: Install Dependencies run: pnpm install --frozen-lockfile - name: Pull Private Content & Build env: CONTENT_REPO_URL: "https://x-access-token:${{ secrets.CONTENT_ACCESS_TOKEN }}@github.com/${{ github.repository_owner }}/my-blog-content.git" run: | pnpm content:sync pnpm build - name: Deploy to GitHub Pages uses: peaceiris/actions-gh-pages@v4 with: github_token: ${{ secrets.GITHUB_TOKEN }} publish_dir: ./dist
Verification
- Create or edit a Markdown post in your external content repository;
- Run
git add .,git commit -m "docs: test dispatch", andgit pushto GitHub; - Open content repository Actions tab to confirm
Trigger Theme Buildran successfully; - Open theme repository Actions tab to confirm
Deploy Shirone Blogwas dispatched.
Next Steps
- Head to Deploy Hook Integrations: Learn Cloudflare Pages, Vercel, and EdgeOne integration patterns
Copyright
Copyright Ownership:matsuzaka-yuki
License under:Attribution 4.0 International (CC-BY-4.0)