
Initializing Private Content Repo
There are two recommended methods to set up your standalone content repository:
- Method 1: One-click Eject with content:eject Recommended: Best if you already have the theme repository locally and wish to extract existing content;
- Method 2: Clone from Official Template From Scratch: Best for users starting from scratch directly with a dual-repo setup.
Method 1: Using content:eject (Recommended) Recommended
If you already have the theme repository locally, the built-in eject wizard is the fastest initialization pathway.
Key Features
- Automated Structure Assembly: Automatically extracts posts, moments, albums, and data files, and generates a valid
shirone.content.jsonmanifest and GitHub Actions trigger workflow; - Minimal Config Export: Exports only essential identity settings in
site.yamlandprofile.yaml, avoiding hardcoded defaults to ensure seamless future upgrades; - Theme Repo Protection: Adds gitignore rules and safely unstages content files from Git while keeping physical files intact for local preview;
- Automatic Local Binding: Connects your theme development workspace to the newly created external directory.
Zero-Risk Dry Run
Running pnpm.cmd content:eject without the --yes flag executes in dry-run mode, printing the export plan without making any disk modifications.
Step-by-Step Guide
Run Eject Command in Theme Repository
Open your terminal in the theme code repository root and run:
Windows (PowerShell)# 1. Dry run: preview files to be ejected (zero disk changes) pnpm.cmd content:eject # 2. Confirm and execute eject (default destination: ../shirone-content) pnpm.cmd content:eject --yes # Or specify a custom output directory: pnpm.cmd content:eject --yes --out "<target-path>" # e.g. "D:\Code\my-blog-content"Linux / macOS (Bash)# 1. Dry run: preview files to be ejected pnpm content:eject # 2. Confirm and execute eject pnpm content:eject --yes # Custom output path: pnpm content:eject --yes --out "<target-path>" # e.g. "/Users/yourname/Code/my-blog-content"Create a Blank Private Repo on GitHub
- Log in to GitHub, click the + icon in the top right corner and select New repository;
- Repository name: e.g.,
my-blog-contentorshirone-content; - Visibility: Must select Private;
- Initialize with: Do not select any initialization files (keep completely empty);
- Click Create repository.
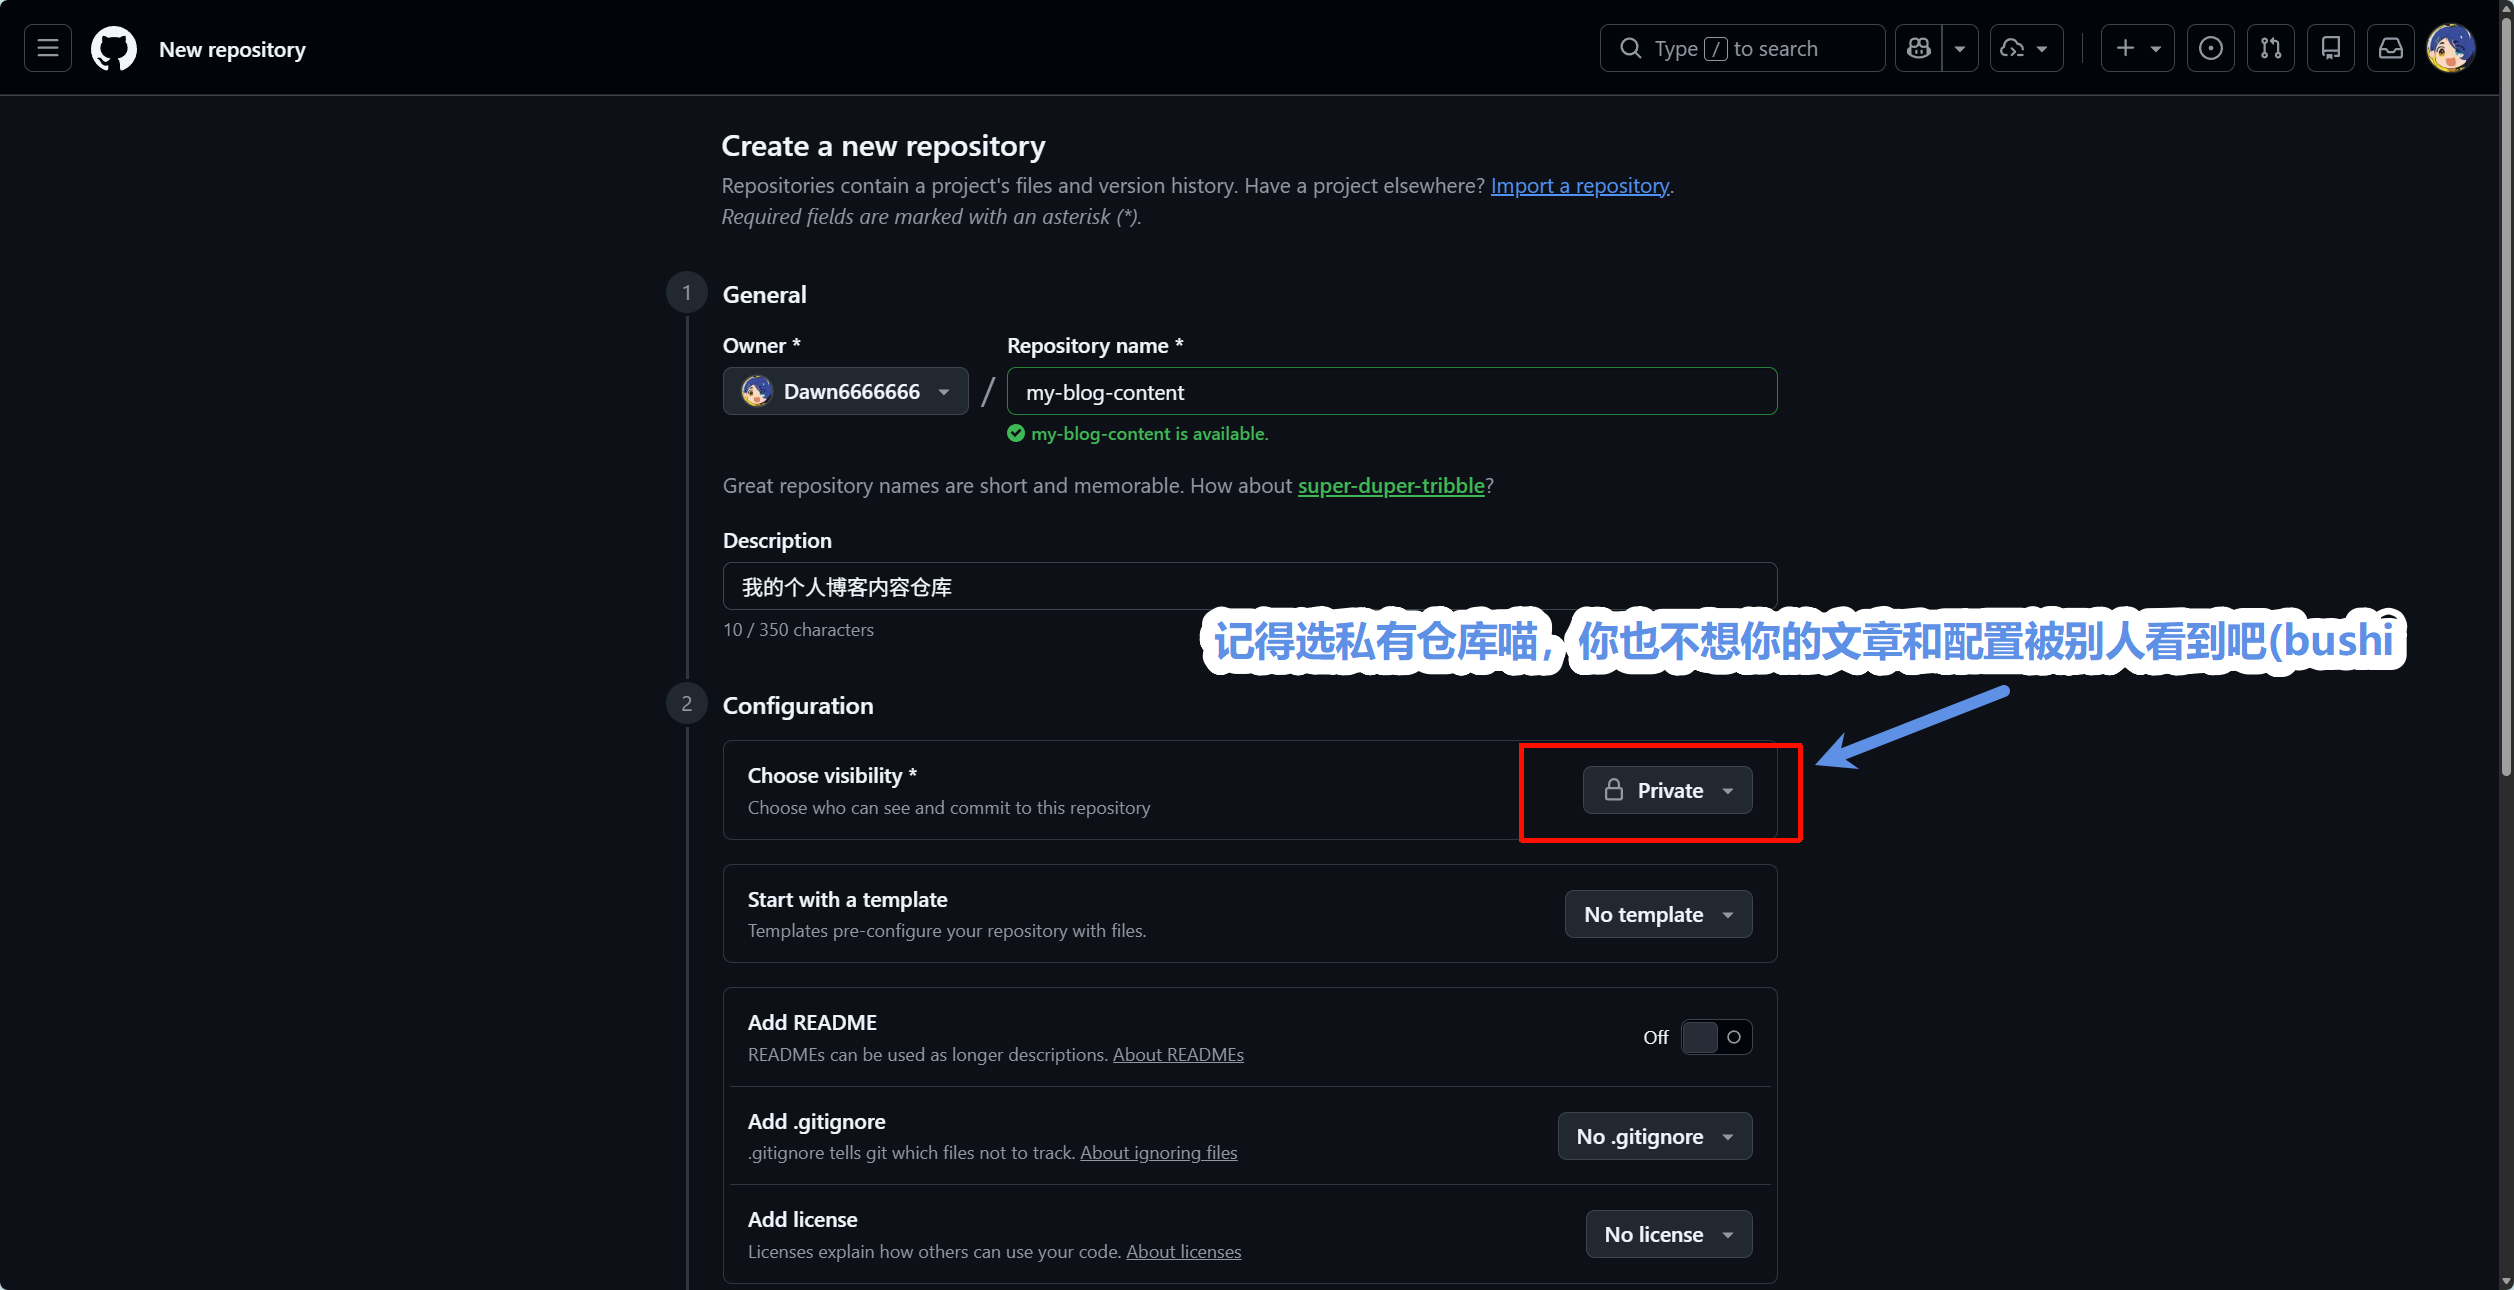
Repository Must Be Private
To ensure your drafts, high-res photos, and private metadata remain secure, visibility must be set to Private.
Push Content Repository to GitHub
In your terminal, navigate to the ejected directory and push:
# 1. Enter the external content directory
cd ../shirone-content

# 2. Initialize Git repository and commit
git init -b main
git add .
git commit -m "feat: initialize private blog content repo"

# 3. Add remote origin and push
git remote add origin git@github.com:YOUR_USERNAME/my-blog-content.git
git push -u origin main
Your standalone private content repository is now fully initialized.
Method 2: Clone from Official Template From Scratch
Step-by-Step Guide
Create a Blank Private Repo on GitHub
Create an empty Private repository on GitHub without adding a README or gitignore.
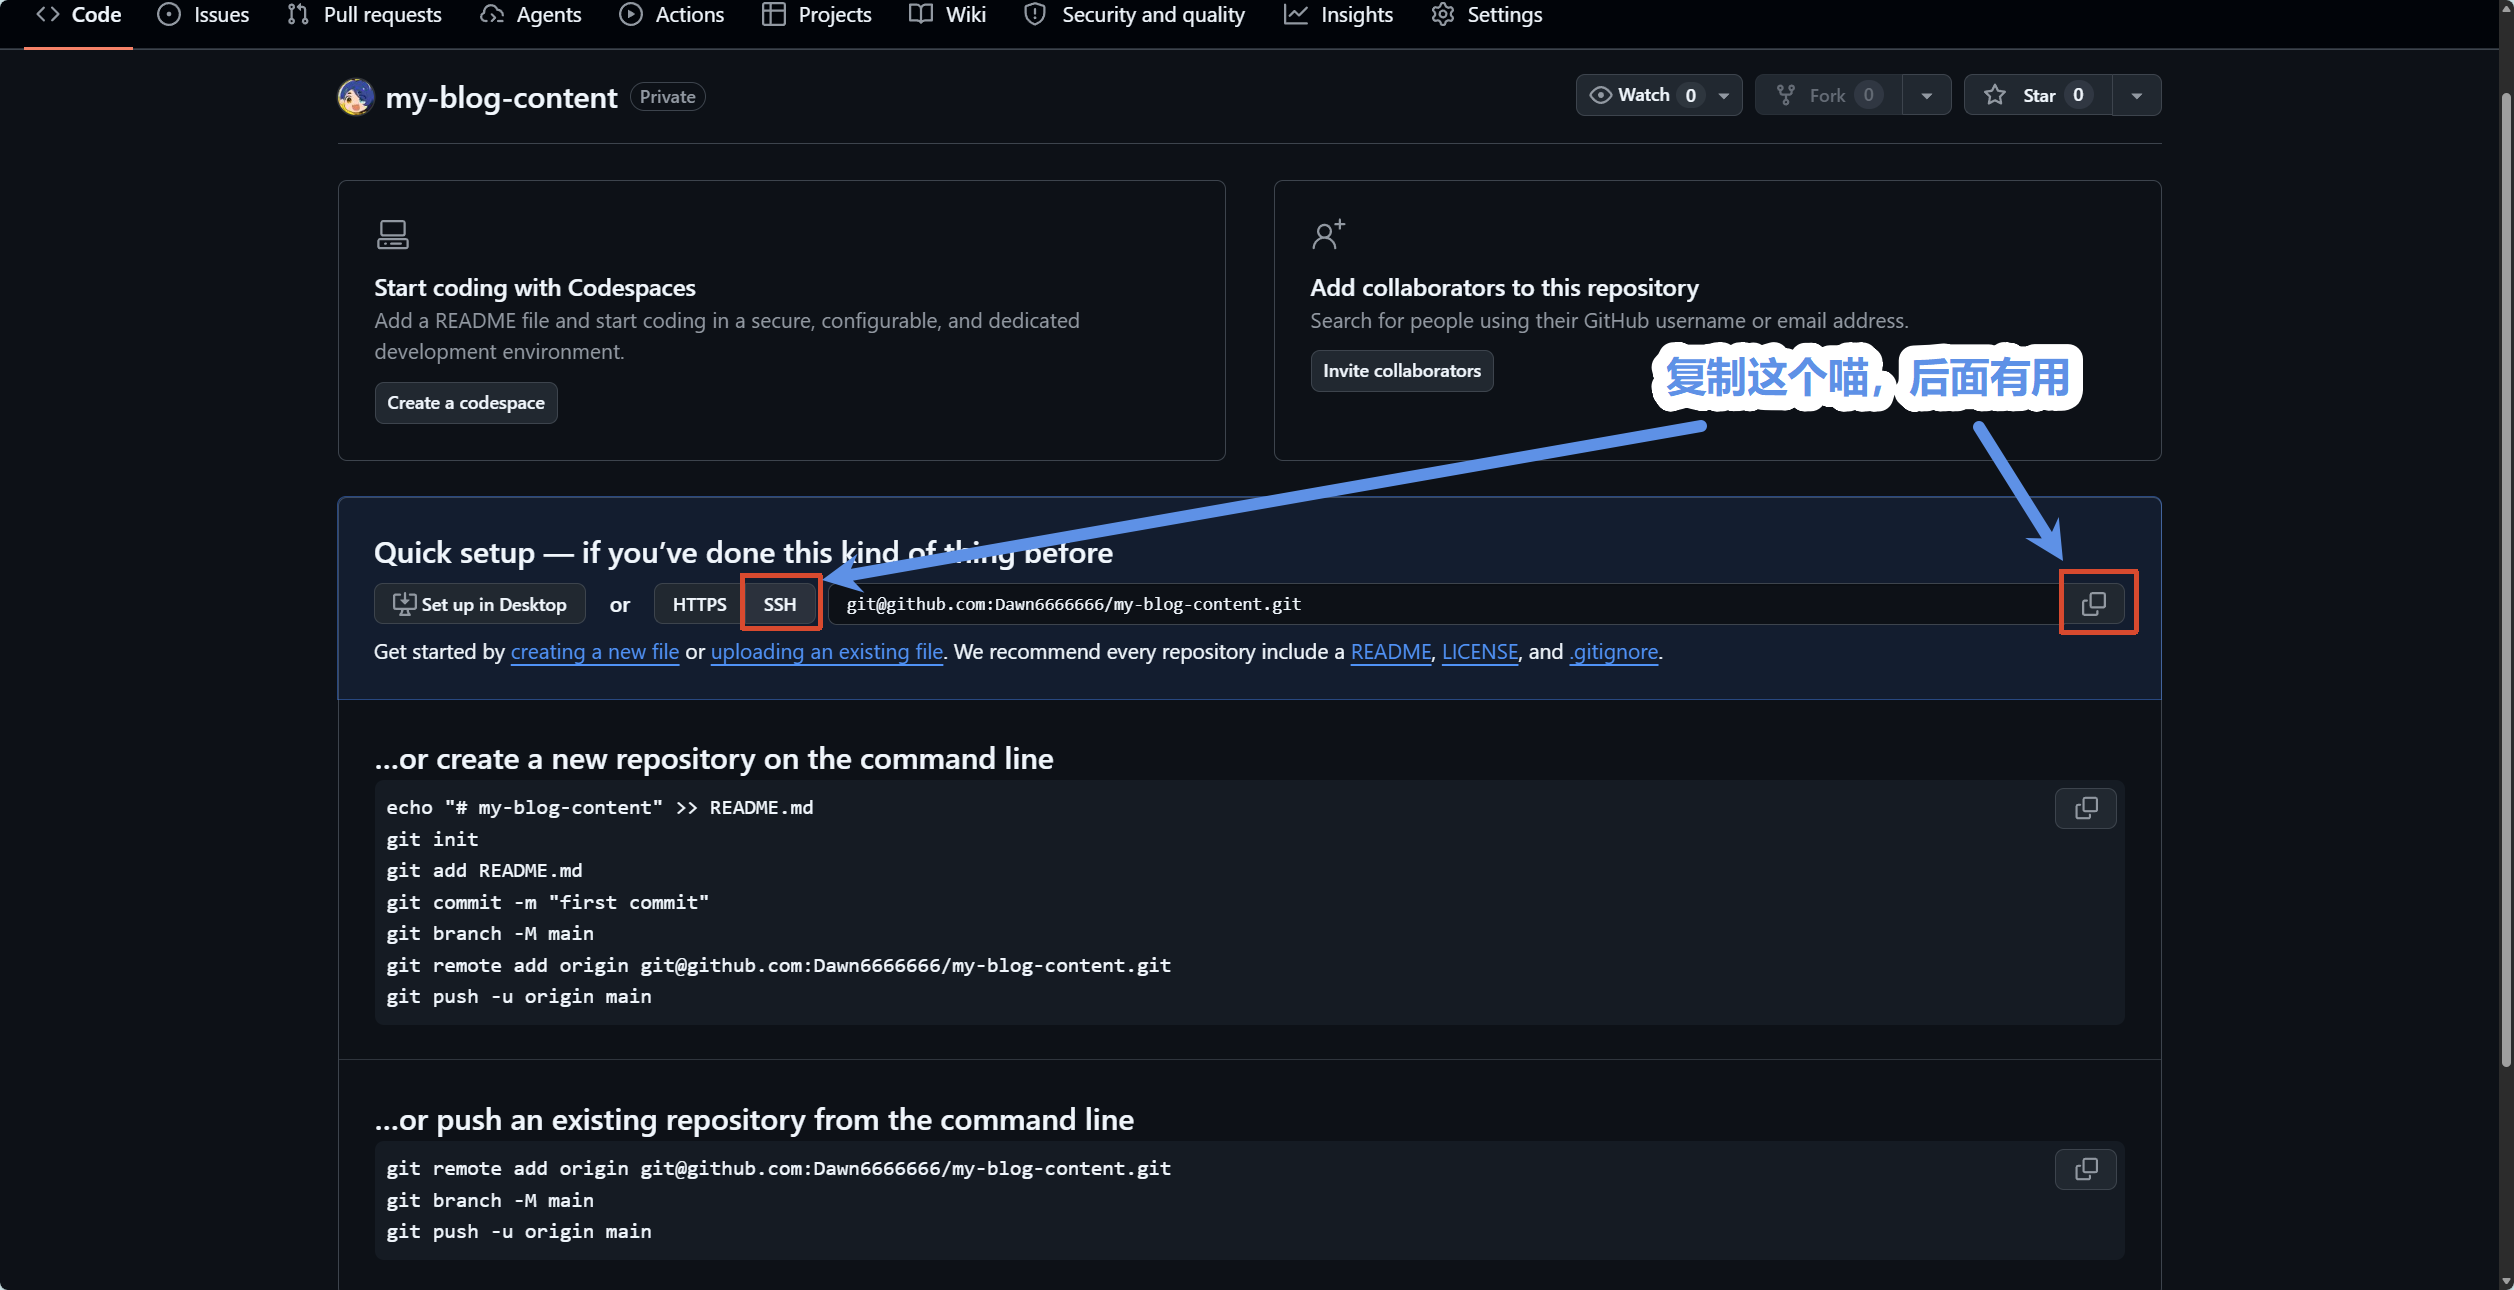
Clone the Template Repository
Run in your terminal:
# 1. Clone the template
git clone https://github.com/LyraVoid/Shirone-Content.git my-blog-content

# 2. Enter the directory
cd my-blog-content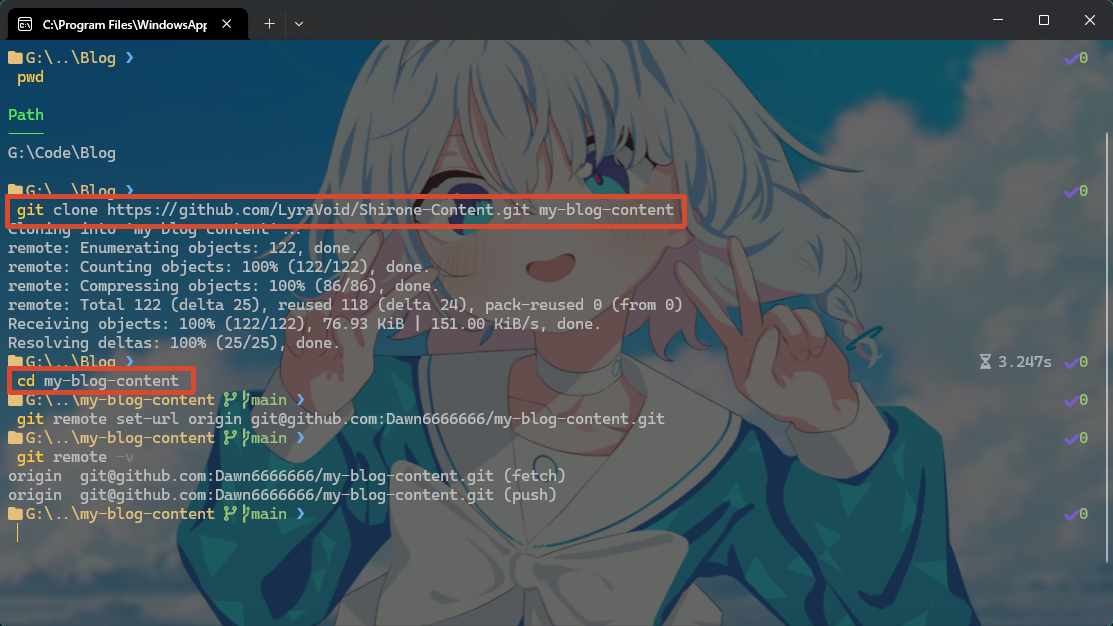
Reset Remote URL to Your Private Repo
# Point remote origin to your new private repository
git remote set-url origin git@github.com:YOUR_USERNAME/my-blog-content.git

# Verify remote URL
git remote -v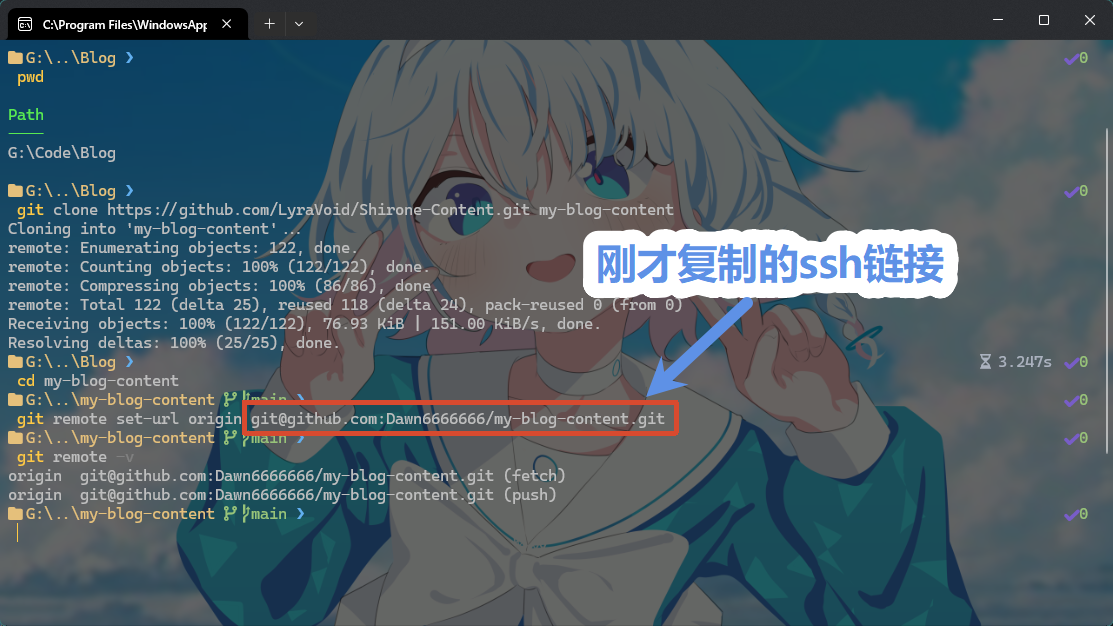
Push to Your Private Repository
git push -u origin main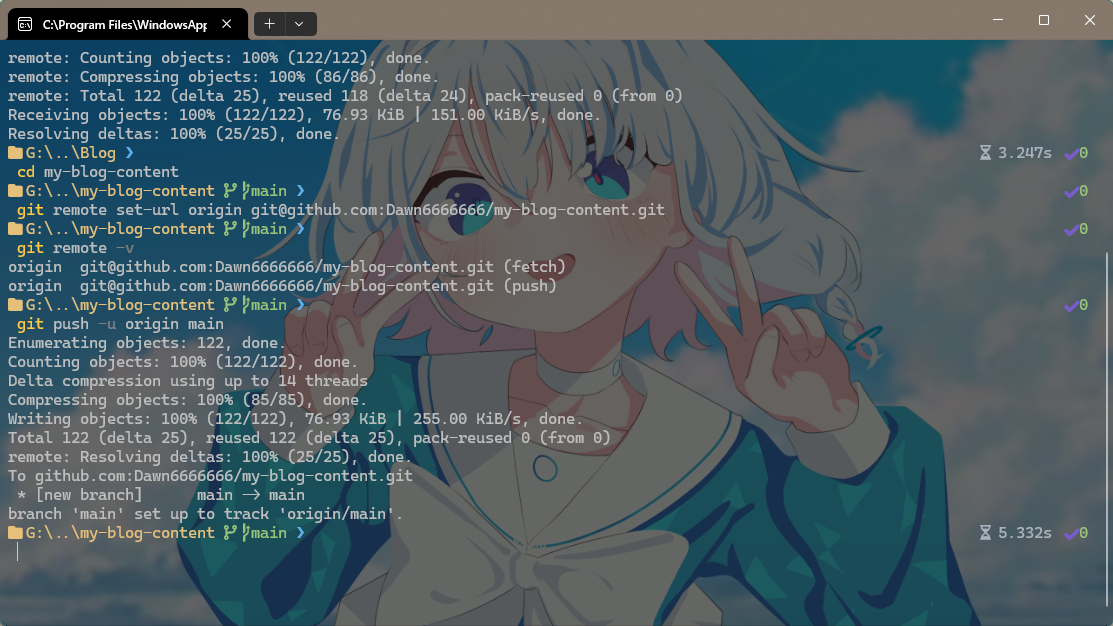
Refresh your GitHub page to see the repository ready for authoring:
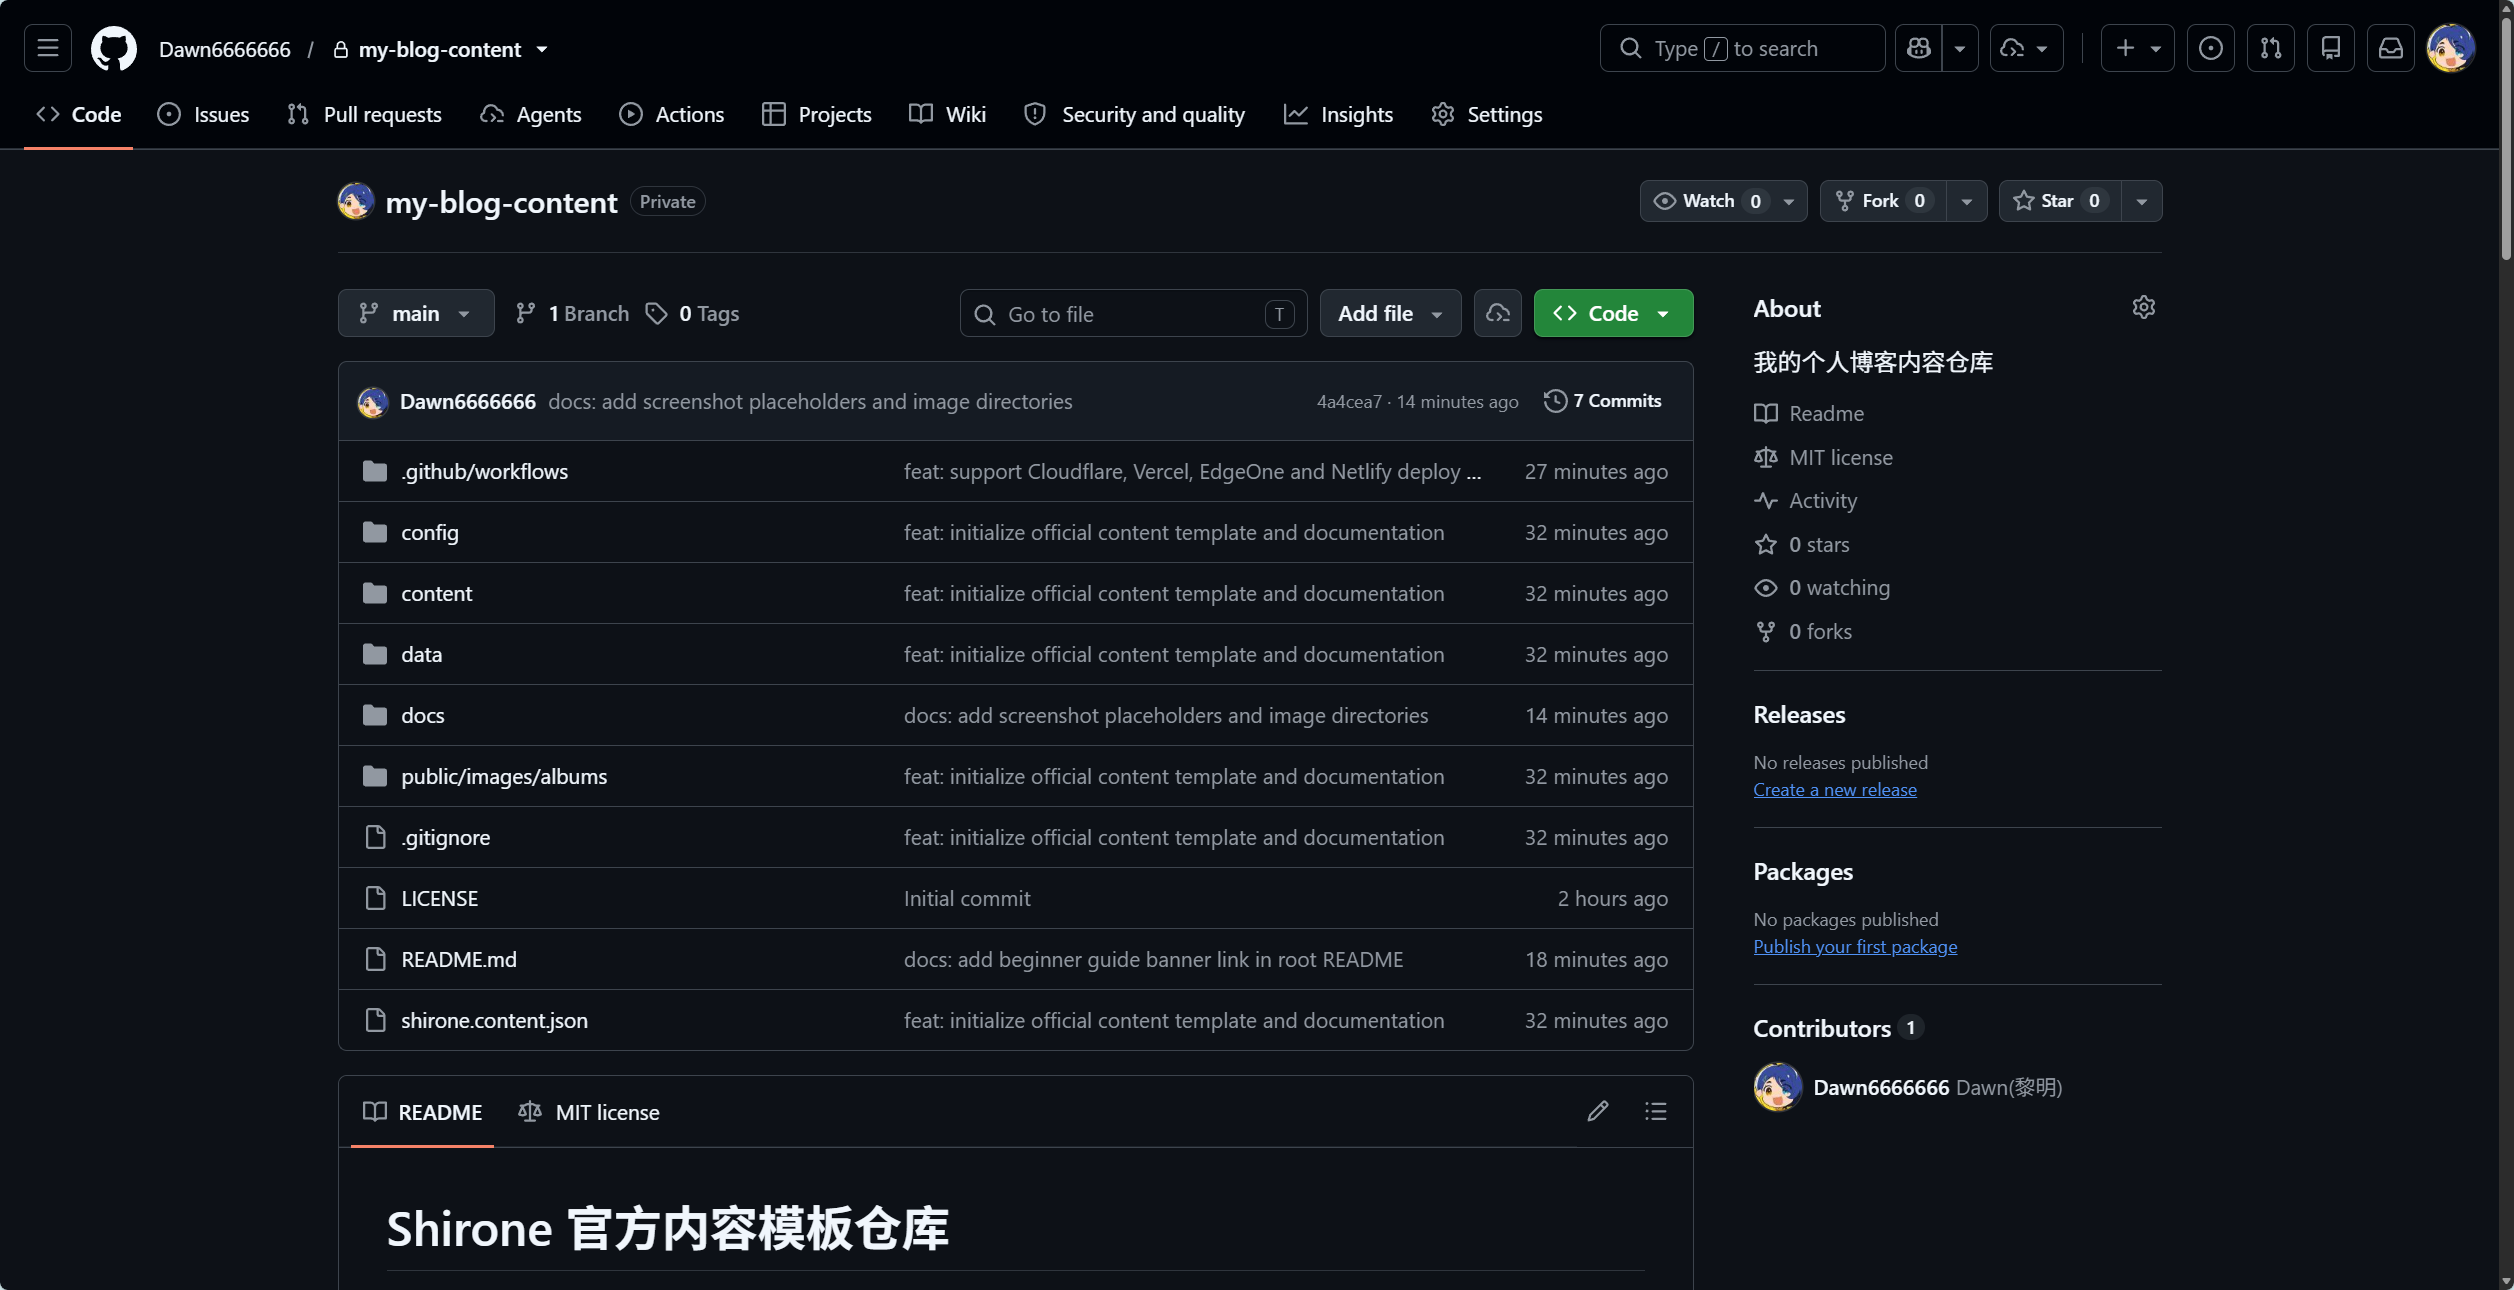
Content Repository Structure and Mapping
Content Repository Structure & Mount Mapping
.github/workflows# GitHub Actions workflows
config# YAML configurations -> Compiled to src/user/user-config.ts
content# Posts and moments -> Mapped to src/content/
data# Structured data entities -> Mapped to src/data/
assets# High-resolution media -> Mapped to src/assets/ (Built-in optimization)
public# Raw static assets -> Mapped to public/ (Published as-is)
shirone.content.json# Content repo metadata identifier
Next Steps
- Head to Local Preview & Debugging: Start local development server with real-time watch mode
Copyright
Copyright Ownership:matsuzaka-yuki
License under:Attribution 4.0 International (CC-BY-4.0)